More and more developer are relying on open source tools and libraries that are UNIX/Linux native. This is especially true for web and other applications that are deployed on public cloud. While I recommends a dedicated Linux development environment, this may not be possible for a lot of developers working on company issued Windows desktop/laptops. For these developers, Windows Subsystem for Linux (WSL) provides a Linux VM that is tightly integrated with the familiar Windows experience. Using the WSL extension for Visual Studio Code further simplifies the experience.
setting up
windows subsystem for linux
The first step is to install WSL. If you are running Windows 10 version 2004 or higher, or Windows 11, just open a PowerShell or Command Prompt in administrator mode and issue the following command:
wsl --installThis will install the default Linux distribution (Ubuntu) for WSL. Check official documentation more installation options.
visual studio code
Next, install Visual Studio Code. Either download the installer from the official site, install from the Microsoft Store or with winget.
winget install -e --id Microsoft.VisualStudioCodeFinally, install the WSL extension. If you work with remote UNIX/Linux machine(s) as well, install the Remote - SSH extension.
Now, fire up a WSL shell by selecting the WSL (Ubuntu in my case) profile.
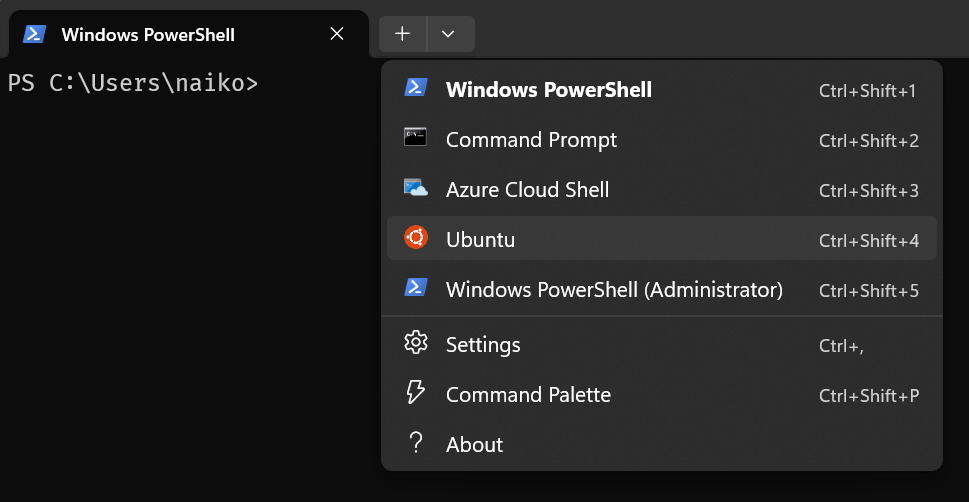
From within WSL shell, create a project directory and launch Visual Studio Code on the newly created project directory. I prefer to create my working directories in WSL so that they observe native UNIX/Linux permissions, case-sensitivities and not to mention the bypass the Windows CRLF mess.
mkdir ~/project1
code ~/project1
On this first invocation, VSCode + WSL extension will automatically trigger the installation of Code Server in the WSL environment. Once this is completed, you’ll see a WSL indicator in the bottom left corner, and we can now use Code as you would normally.

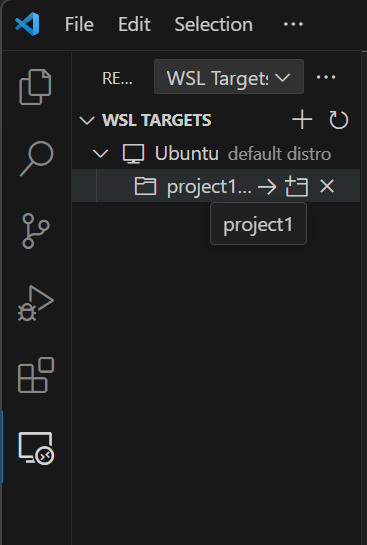
Subsequently, we can also connect to the WSL development session from the Code UI directly using the Remote Explorer
git, powerline and other common tools
At this point we have a WSL environment setup and accessible either via Windows Terminal or Visual Studio Code. It’s time to install/setup some common development tools, starting with Git:
sudo apt install gitI prefer working with zsh so I have a common shell when working on my Linux and MacOS boxes. I’ve adapted my dotfiles repo for my Debian box for WSL here. This setup give me zsh with syntax highlighting, tmux and vim with powerline integration.
First install the pre-reqs:
sudo apt install zsh stow
sudo apt install powerline-status powerline-gitstatus
# optional, if using powerline with tmux and vim
sudo apt install tmux vim-nox
Next, clone dotfiles repository and install the config files using stow:
cd ~
git clone --recursive https://github.com/naikoob/dotfiles.wsl.git .dotfiles
cd ~/.dotfiles
for dir in *; do [ -d $dir ] && stow $dir; done;
Now I can switch to zsh:
# switch user shell to zsh
sudo usermod -s /usr/bin/zsh <replace-with-wsl-userid>
powerline font
For the best experience with Powerline, install a font that supports powerline characters. There are many fonts available here. Personally, I use the excellent FiraCode by Nikita Prokopov. There are detailed instructions available on his GitHub repo, but essentially :-
-
Download the font
-
Unzip or open the downloaded zip file. In the ttf folder, open each font (double-click) and the click on "Install" to install the font.
-
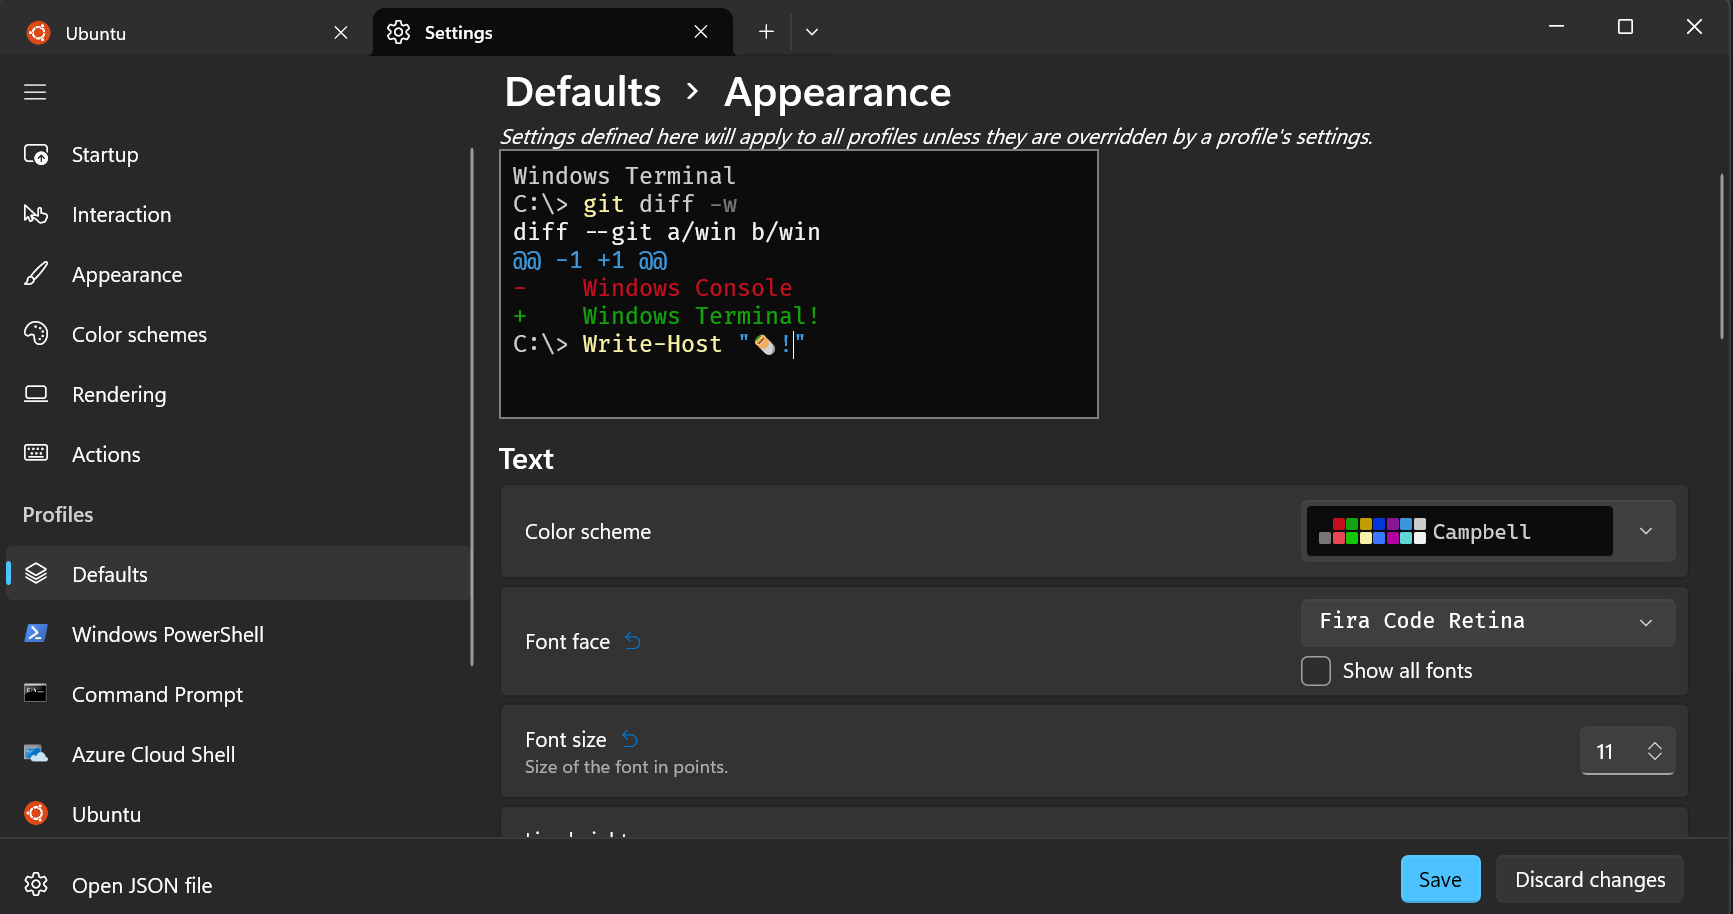
In Terminal, open "Settings" from the dropdown menu or with
ctrl+, -
Select "Defaults" profile, and navigate to "Appearance" to update the font face:
-
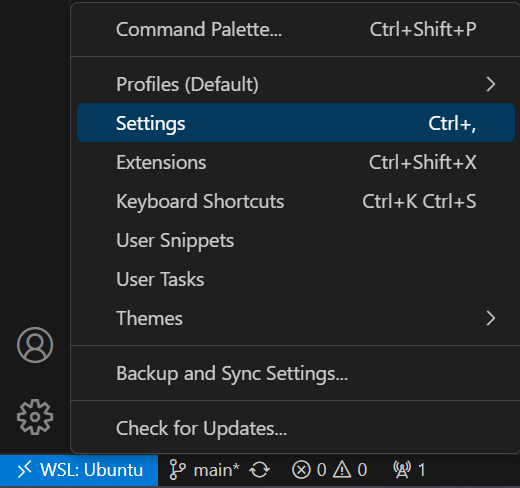
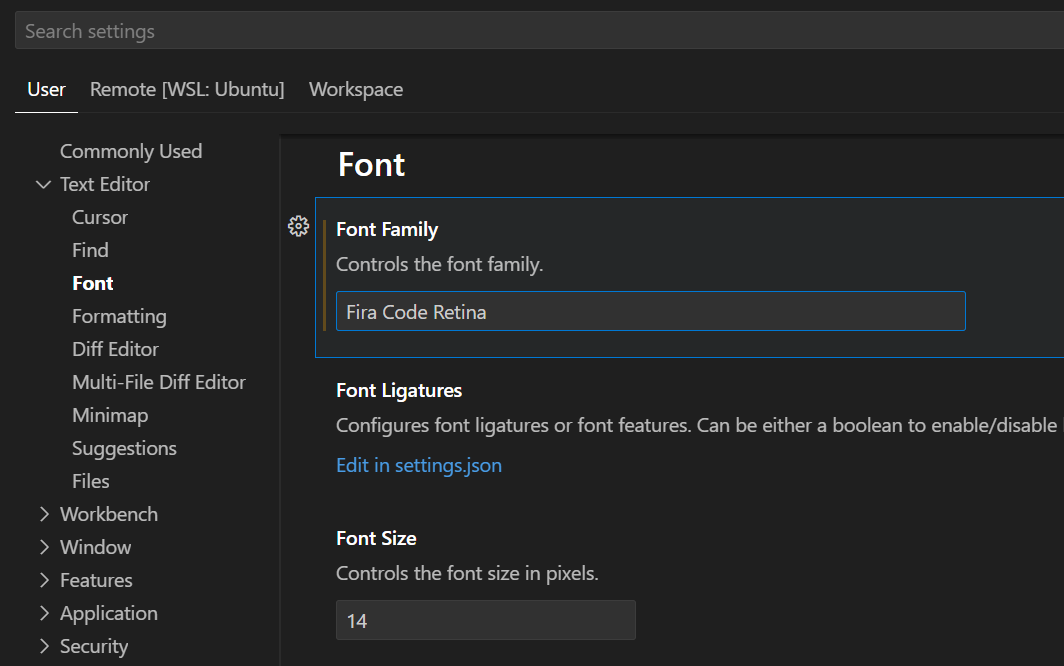
In VSCode, open the Settings window by selecting the gear icon at the bottom left corner and select "Settings" from the pop-up menu. !
-
In the "Settings" window, navigate to "Text Editor → Font", and update the "Font Family":
closing
At this point we have a development environment with nice git status prompt via powerline. In my next article, I’ll write about developing for Google Cloud.